Step 1
Download the Lightroom presets on your mobile device.

Step 2
Open the file with a file management app. Many phones have a file management app built in. If you do not have one, we recommend using:
- Android Devices: Google Files
- iOS Devices: Documents by Readdle

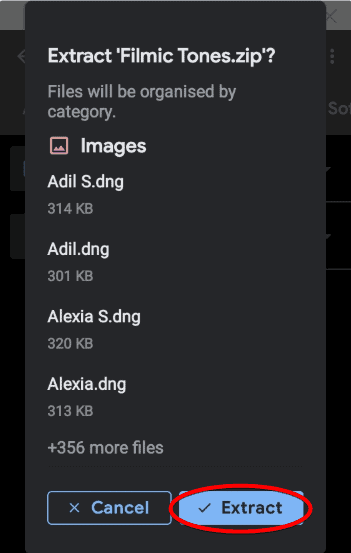
Extract the files.
Step 3
Switch back to the Lightroom app. We recommend storing the presets in a new album. Tap on the New Album icon.

Enter the product name as the album title then click OK.

Step 4
Open the newly created album then click on the Add Photos button.

Step 5
Select all of the DNG presets (you can checkmark the date to do this quickly). Click the Add button.

Step 6
Once the images have been added, sort it by file name.

Step 7
Tap on a preset that you’d like to use. Tap on the menu at the top right then tap “Copy Setting”.

Step 8
Open the photo that you’d like to edit. Tap on the menu then tap on “Paste Setting”.

Note: DNG presets do not support the opacity setting. To use this feature, you must have an active Adobe Creative Cloud subscription and sync the presets to your phone.