Step 1
Copy the Photoshop CC\Best Luts folder to the following locations:
- Macs: ~/Library/Application Support/Adobe/CameraRaw/Settings
- Windows (Local User): C:\Users\[YOUR_USERNAME]\AppData\Roaming\Adobe\CameraRaw\Settings
- Windows (All Users): C:\ProgramData\Adobe\CameraRaw\Settings
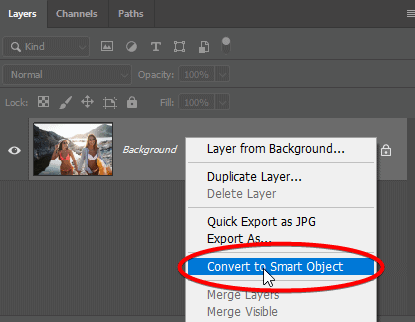
Step 2
Run Photoshop. In the Layers panel (Window > Layers), find the layer that you want to apply the Lightroom/ACR preset to. Right-click on the layer and choose “Convert to Smart Object”.
Note: By converting the layer to a Smart Object, you will be able to change the filter settings later.
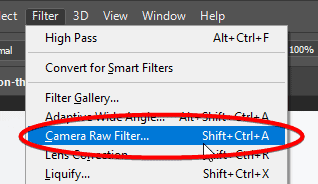
Step 3
Go to Filter > Camera Raw Filter.
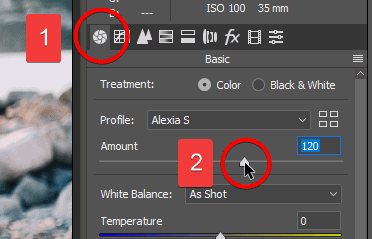
Step 4
Go to the presets tab then select a Lightroom/ACR preset that you’d like to apply.

Step 5
To change the opacity, go to the Basics tab then adjust the Amount setting.
Note: Best Luts presets are designed to be used up to 150%. Anything more is an artificial calculation by Lightroom. Please pay careful attention to the tones when using any setting above 150%.
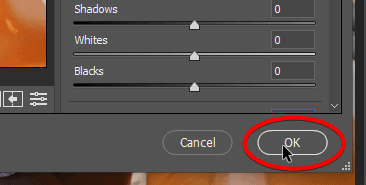
Step 6
Click OK when you’re done editing.
Step 7
To go back and change the settings, double-click on “Camera Raw Filter” in the Layers panel.
